17 December 2012
Striped Stockings
This pattern assumes you can work in the round and know a little bit about knitting socks, but that you are not so set in your ways that you can't break the rules a bit :)
Size 7 double point needles or circulars
Gauge:
8" wide x 11" tall = 2"x2"
Top of the stocking:
Your needles are 1,2,3,4 in that order as you cast them on. You should have 15 sts on each needle and use a stitch marker to mark the beginning of your round if you like.
CO 60 sts and join in the round
Work 1" k1p1 ribbing
In stockinette stitch, work stripes that are 3 rounds tall each. To avoid jogging stripes, slip the first stitch of the new color when you come back around to it, and continue knitting around. You can find more details on tech knitting right here http://techknitting.blogspot.nl/2007/01/jogless-stripes.html?m=1
Work the leg of the stocking for 49 rounds. This means you will begin the heel after working 1 round of white in round 49.
Heel
Knit across needle 1 sts
The 30 sts on needle 2 & 3 will be your heel, ignore needles 1 and 4 for now.
With white, work 8 rows stockinette, slipping the first st of each round
Move all sts to one needle
(When slipping,
Slip first st, K14 k2tog k1 turn
Slip first st p4 p2tg p1 turn
Slip first st k5 k2tog k1 turn
Slip first st p6 p2tg p1 turn
Slip first st k7 k2tog k1 turn
Slip first st p8 p2tg p1 turn
Slip first st k9 k2tog k1 do not turn
You should now have 23 heel sts
(I know we didn't finish the heel here. It's ok.)
Now we are going back to working in the round.
Pick up 5 sts along each side of the heel flap as you knit one round even
Needle 3 is now needle 1 and the start of the round (it begins in the middle of the heel flap). Divide the heel flap and gusset stitches evenly onto 2 needles 16 on one and 17 on the other (doesn't matter which needle has more, in my uneducated opinion)
K across needle 1 until 3 sts left, then k2 tog, k. K across needles 2 and 3, k1 ssk, knit across needle 4.
K around
Repeat these 2 rounds three more times
Knit even for 15 rounds
Now for the toe decreases:
Knit across needle 1 until there are 3 sts left. K2tog, k, ssk next sts, knit across needle 2 and then needle 3 until there are 2 sts left on needle 3. K2tog, k1, ssk and k across needle 4
Knit even
Repeat these toe decreases 6 more time or until you have a nice rounded toe. Trim your yarn leaving a long tail, then use this tail to cinch up the toe by threading it through all of the stitches and pulling tight. Knot it and weave in all ends.
For the loop, you can use fabric, an I cord, or a crocheted piece to stitch onto the inside. I crocheted a piece for the loop by chaining 24, and then sc two rows.
Finishing:
If you are using acrylic yarn, I recommend "killing" it for nice drape and shine. This means you will pin it out how you want it, cover it with a clean wet towel, and press the wet towel with a hot iron. Iron in short spurts because you don't want it to melt the yarn completely, just a bit. This will make that yarn really open up and be the shape you want it to be.
Labels:
Christmas,
crochet,
Free pattern,
killing acrylic,
knitting,
stocking,
stripes
20 July 2012
Ravellenic Games
So as you know, the Olympics are a little under a week away (yay!) and that means it is also time for the Ravellenic Games! This is a contest on Ravelry where teams compete in many various events. Each person is urged to expand their own personal limits in the spirit of the games.
I am participating in Baby Dressage and am going to make an Aran Cabled Jumper by Eileen Casey, I'm also going to make a Crocodile Stitch baby afghan which will be my own pattern. That will be for the Afghan Marathon as well as Baby Dressage events.
Finally, I'm going to attempt to finish the ugly afghan. Do you remember the ugly afghan?
I've been working on this since 2005. Yes. This blanket is 7 years in the making. My son has finally fallen in love with it, so when I finish it, It will be his. More likely, it will be a throw for our couch because it is SO thick and warm.
It is made mostly with Red Heart Super Saver held three strands thick and dc across. Fast and such a yarn burner!
Wish me luck as I train in the next week :)
12 July 2012
Tyrannosaurus and Volga Viking Hat/Beard
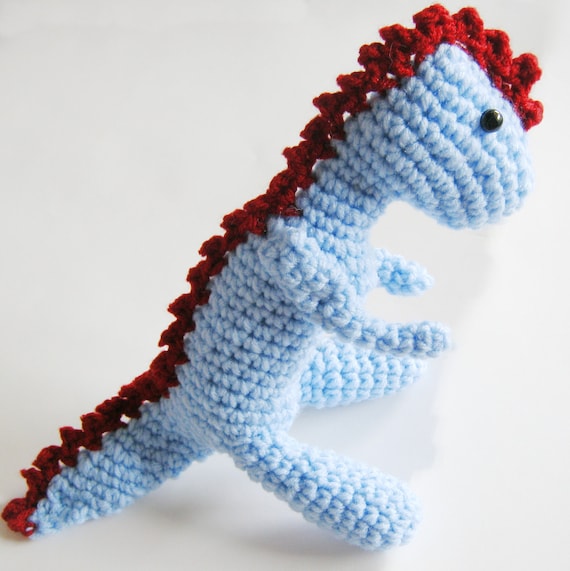
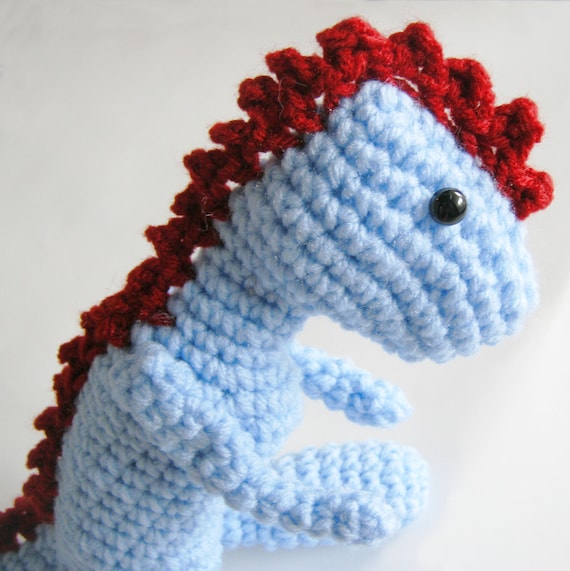
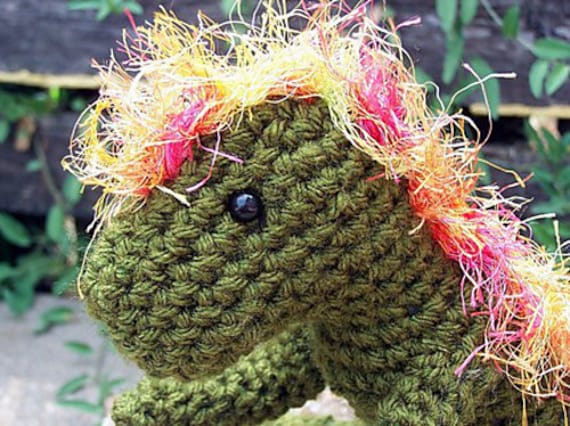
I've had the tyrannosaurus pattern for a long time, but it was one of the first patterns I wrote and it was not as clear and organized (and pretty ^_^) as my patterns now. SO I revamped it! Check out the new pictures that includes the new picot stitch option for the spine.
I've had the tyrannosaurus pattern for a long time, but it was one of the first patterns I wrote and it was not as clear and organized (and pretty ^_^) as my patterns now. SO I revamped it! Check out the new pictures that includes the new picot stitch option for the spine.
So fun! I love making these little guys and my kids love them. You can get your hands on the new pattern on Etsy here or on Ravelry here. The pattern is being tested as well so any kinks will be thoroughly worked out!
Another upcoming pattern and hat for the shop is this:
The picture is of the ever-elusive Mr. Bowrene and the hat is the Volga Viking Hat! The pattern is being tested by 5 wonderful geniuses and it will be ready within a week or so. Once that is all done, the hat is being shipped to my baby brother. He has promised me that it will live a good life with him :)
06 July 2012
Tour de Fleece Team Kromski 2012!
So as you may or may not know, the Tour de France is going on this month. On Ravelry, I participate in a tribute to the Tour called the Tour de Fleece. Yep. Spinning time! The goal is to spin every day of the tour and I have done pretty well so far. Since June 30th, I have spun 610 yards of laceweight singles from the Black and White mill ends I got from the Sheep Shed Studio. They are really lovely and easy to spin. They have a pretty long staple length and the fibers separate very smoothly. The black is a little courser than the white, so together, they make a beautiful yarn.
So as you may or may not know, the Tour de France is going on this month. On Ravelry, I participate in a tribute to the Tour called the Tour de Fleece. Yep. Spinning time! The goal is to spin every day of the tour and I have done pretty well so far. Since June 30th, I have spun 610 yards of laceweight singles from the Black and White mill ends I got from the Sheep Shed Studio. They are really lovely and easy to spin. They have a pretty long staple length and the fibers separate very smoothly. The black is a little courser than the white, so together, they make a beautiful yarn.
I just finished the first bobbin during my morning spinning session. To make the singles "stick" and not untwist, I kept them on the niddy noddy (my PVC homemade one) and dunked them in hot hot hot water in the bathtub. I sort of slapped it in the water, still on the niddy noddy, several times. Then I took it off the niddy noddy, being careful to keep it in a big loop and moved it back and forth between cold water in the sink and hot water in the bathtub. Finally, I squeezed the yarn out and thwacked* it against the bathtub wall pretty fiercely.
*Thwack: v. to take a large wet loop of yarn and whack it hard against something so that it makes a thwacking sound
I am going to spin about 200 more tonight. You see, this is not just my typical "spinning for the heck of it." I have a PLAN!
I am going to use this yarn for the "Winter's Thaw" shawl by Hedgehog Fibers
24 June 2012
Here is a pattern inspired by Harry Potter--the Golden Snitch!
Enjoy!
Enjoy!
Materials
Gold and White Acrylic Yarn
(Red heart or similar)
Size G hook
Tapestry needle
Abbreviations
ch=chain
sc=single crochet
sl st= slip stitch
st=stitch
Snitch Body
ch 2
Round 1: 6 sc in
2nd ch from hook, do not join
Round 2: 2 sc in each
sc around
Round 3: *sc in next sc, 2 sc in next sc*
Repeat ** around
Round 4-6: sc in each st around
Round 7: *sc in
next 3 sc, skip next st* Repeat **
around
stuff with fiberfill
now
Round 8: *sc in next 2 sc, skip next st*
Repeat ** around
Round 9: *sc in next sc, skip next st* Repeat
** around
Round 10: skip 2 sts, sl st in next st to
close up the hole.
Fasten off, weave in ends.
Wings (make 2)
ch
12
Row 1: Sc in 2nd
ch from hook and in next 3, skip 2 stitches, sc across, ch 2
Row 2: Sc on
other side of beginning chains ( don’t turn your work over, but rotate it 90
degrees clockwise so the beginning chains are up so you can work them ), 5 sc
across, ch 1, turn
Row 3: Sc in each
st across, 2 sc in final sc, ch 1 fasten off pulling the last ch1 snug with a
long enough tail to stitch it to the ball.
When you stitch the
wings to the ball, stitch them over the first and last stitches.
03 June 2012
Hi all!
I have decided to upload a new pattern just for you! It is an adorable pumpkin hat and here are the directions:
This hat makes a newborn sized hat, but you can make it however large you want by either going up needle sizes, or increasing the number of knit stitches between purl stitches (read through the pattern and this will make sense)
On size 3 or 4 DPNs with orange worsted weight yarn,
Cast on 56 stitches and join in the round using your preferred method
Complete about 4" of K6 P1 "ribbing" (I put "ribbing" in quotations, because the result does not really look like your traditional ribbing)
Now for the decreases
After each purl stitch, K2tog, knit the other knit stitches and purl the purls
Work the next round in the pattern (knit the knits and purl the purls)
Next round of decrease: before each purl stitch, SSK, work all the other stitches in pattern
Work the next round in pattern
**Now we are going to do both methods of decreasing. After each purl, K2tog, before each purl, SSK, knit and purl all other stitches in pattern***
Work the next round in pattern
Repeat the red rounds, above, once more so that you only have 18 stitches left on your needles.
K2tog for the remaining knit stitches and purl the purl stitches
You should have 12 stitches left. K2tog around so that there are 6 stitches left on your needles.
Drop orange and join with light brown.
Knit all stitches until the stem measures about 2" then do the following:
K1, K2tog, K1, KFB
Knit
Repeat these two rounds twice more. This increasing and decreasing within the round will help make your stem curl over. The amount of curl depends on you, if you want less, only do it once. If you want more, then keep going until you get what you're looking for.
Knit around for another 1-2" or until the stem is your desired length. Use a cinch bind off to close up the opening. This means you should pull up your most recent stitch so there is a very long loop. Snip it, and pull it through the other stitches using a crochet hook or your fingers or a darning needle and pull tight to close. I like to knot it off as well before weaving in the ends.
For the leaves, make 2 and follow along below. Each line is a row.
With green, cast on 8 stitches
Knit across
Purl across
K2tog, knit to last two stitches, SSK
Purl across
Continue these last two rows until you are down to two stitches, bind off and stitch to the top of your hat using a darning needle.
Enjoy!
Subscribe to:
Posts (Atom)


